Hi guys, I am sorry for late due to busy work schedule. But now i am here to fulfill my promise –
Today we will discuss about PowerShell scripts & there execution-
If you are new to PowerShell Please read previous blogs-
Introduction to Windows PowerShell (Part 1)
Introduction to Windows PowerShell (Part 2)
Lets start with simple example-
Open your notepad and write simple PowerShell command : get-date or any thing else
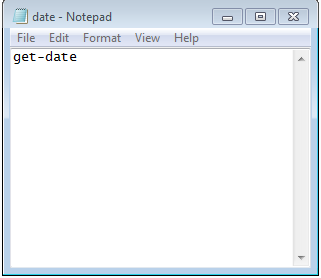
save this notepad with any name with ps1 extension. as i have saved it with date.ps1 (I have saved it at D:)
File extension : ps1
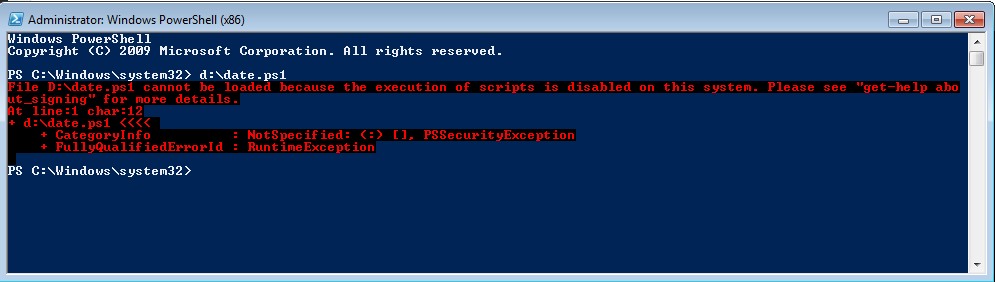
Now open your PowerShell with (run as administrator).
write file name with extension (included file path eg. for me d:\date.ps1)
Oh no, its giving an error. Right->
Now you need to understand few concept about PowerShell scripting & its execution-
Due to security reason, Powershell execution policy is restricted. Which means default execution policy is restricted. You can check it by typing command get-ExecutionPolicy
Types of ExecutionPolicy :
- Restricted : Default
- Default : Corresponds to “Restricted”
- Allsigned : Digital sign required
- RemoteSigned : Run local unsigned script
- Unrestricted : No restriction
Now we need to change ExecutionPolicy. Let we are running this script locally so we will choose Remotesigned. For this you need to write command set-ExecutionPolicy Remotesigned
You need to enter ‘y’ to confirm at the time of changing execution Policy. now execute that PowerShell script-
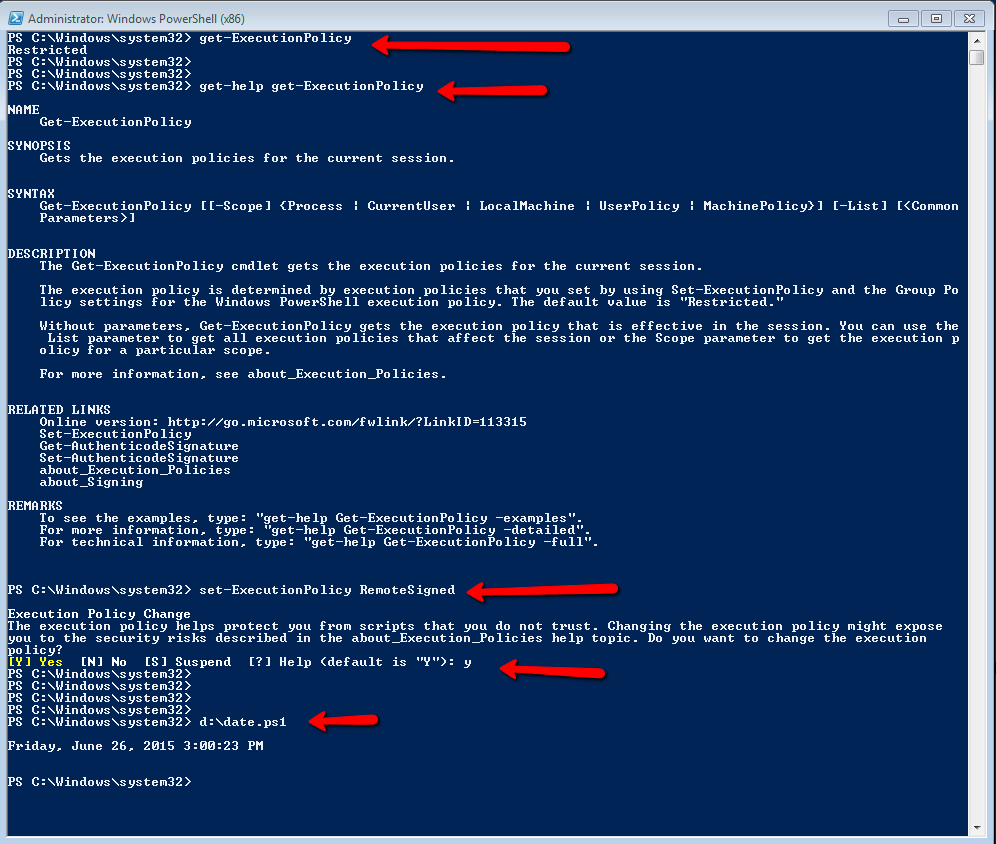
You got it.
Remember, Try to change the executionpolicy to default or restricted after execution of script.
Now try few more commands to execute through scripts.
In next session, we will discuss about parameterize scripts & their execution.
Till then take care bye bye.
One response to “Introduction to Windows PowerShell (Part3)”
[…] Introduction to Windows PowerShell (Part3) […]